 By Alexis Grace
Winter weather brings a unique set of challenges for residential homes, and the roof stands as the primary line of defense against freezing temperatures, heavy snow accumulation, and ice dams. When autumn fades and sub-freezing temperatures approach, minor roof vulnerabilities can quickly escalate into expensive structural repairs or severe interior water damage. Proactive roof maintenance before the first winter storm hits is essential for safeguarding your home and ensuring optimal energy efficiency. Taking the time to inspect, clean, and reinforce your roofing system protects your investment and provides peace of mind throughout the coldest months of the year.
Conducting a Ground-Level and Roof Inspection
Before investing in professional repairs or climbing onto the roof yourself, a thorough visual assessment is necessary. Identifying structural warning signs early allows you to address localized damage before freezing moisture expands existing cracks or gaps.
-
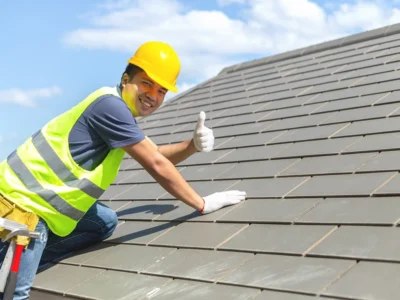
Check for Missing Shingles: Look for cracked, curling, or entirely missing asphalt shingles that leave the underlying decking exposed to infiltrating moisture.
-
Inspect Flashing Around Penetrations: Examine the metal flashing surrounding chimneys, skylights, plumbing vents, and roof valleys for loose seals or rusting joints.
-
Look for Granule Loss: Inspect your gutters and downspouts for an accumulation of dark asphalt granules, which indicates that your shingles are aging and nearing the end of their lifespan.
Clearing and Maintaining the Gutter System
Clogged gutters are a primary catalyst for winter roofing disasters, particularly the formation of destructive ice dams. When autumn leaves and debris block the natural flow of melting snow, trapped water overflows, freezes against the eaves, and forces moisture beneath the shingle layers.
-
Remove Organic Debris: Clean out all leaves, twigs, and dirt from your gutters and downspouts to ensure unobstructed water drainage away from your foundation.
-
Extend Downspouts: Ensure downspouts direct melted snow and ice at least three to four feet away from the exterior walls to prevent pooling and foundation erosion.
-
Test Drainage Slopes: Verify that your gutters maintain a proper downward slope toward the downspouts so stagnant water does not pool and freeze solid during sub-zero nights.
Trimming Overhanging Tree Branches
Winter storms bring heavy loads of ice and high-velocity winds that can snap weak tree branches. Trees growing too close to your roof pose an immediate physical hazard and contribute significantly to seasonal roof wear.
-
Eliminate Friction Points: Cut back any branches that scrape against your shingles during windstorms, as this continuous friction strips away protective granule coatings.
-
Prevent Squirrel and Rodent Access: Overhanging limbs provide an easy bridge for mice, squirrels, and raccoons looking to nest in your attic or chew through wooden roof vents.
-
Reduce Leaf Litter: Trimming back canopy branches minimizes the volume of wet leaves that accumulate on your roof and trap moisture against the surface.
Checking Attic Insulation and Ventilation
A healthy winter roof depends heavily on what happens underneath it inside the attic space. Proper insulation and airflow regulate the temperature of the roof deck, preventing the uneven melting cycles that cause ice dams.
-
Balance Intake and Exhaust: Ensure your soffit vents and ridge vents are completely unblocked by insulation batts, allowing continuous air circulation that keeps the roof deck cold.
-
Upgrade Insulation Depth: Add adequate insulation to the attic floor to prevent household heat from escaping into the attic cavity and warming the underside of the roof deck.
-
Seal Air Leaks: Check for gaps around light fixtures, plumbing stacks, and attic access hatches, sealing them tightly with expanding foam to stop warm indoor air from leaking upward.
Frequently Asked Questions
What causes ice dams to form on a roof during winter?
Ice dams form when heat from a poorly insulated attic warms the upper sections of the roof deck, melting the bottom layer of snow. This water runs down the roof until it reaches the cold eaves, where it refreezes into a ridge of ice that blocks subsequent melting water from draining.
Is it safe to shovel snow off my roof after a heavy storm?
Generally, you should avoid shoveling your roof unless snow accumulation reaches dangerously heavy levels that threaten structural collapse. Improper shoveling can easily tear asphalt shingles, puncture waterproof membranes, or cause severe personal injury from falls.
How can I safely inspect my roof without climbing a ladder?
You can perform a comprehensive preliminary inspection from the ground using high-powered binoculars or by flying a drone around the perimeter of your house to capture detailed photographs of your shingles and flashing.
What type of professional should I hire for a pre-winter roof check?
Look for a licensed, bonded, and insured local roofing contractor who specializes in residential inspections. Ensure they provide a comprehensive written report detailing the condition of your shingles, flashing, attic ventilation, and chimney stack.
How do heated cables prevent winter roof damage?
Electric de-icing cables or heat tape can be installed along roof edges and inside gutters in a zigzag pattern. When plugged in, they generate mild heat that melts channels through ice dams, allowing trapped water to drain safely off the roof.
How do I know if my attic ventilation is performing correctly?
If you notice heavy frost accumulation on your attic framing during freezing weather, or if your roof snow melts much faster than neighboring homes after a storm, your attic is likely suffering from poor ventilation and heat loss.