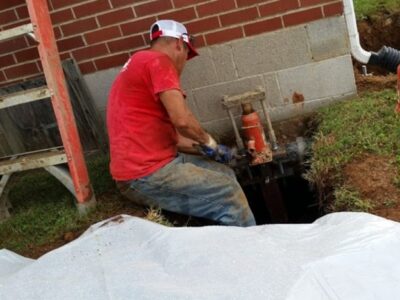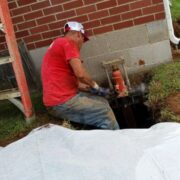

Saying that water line installation requires a lot of work would be a tremendous understatement. Even in ideal circumstances it’s a difficult task to bring to fruition. But any outdoor work is subject to the unpredictability of nature. Problems with substrate can become apparent late into the project. Weather can be a huge concern. And there’s quite a few other issues that can appear out of nowhere. And it’s true that one can’t do anything to prevent many of these issues. But this also means it’s wise to put effort into precautions which can make a difference. And this means proper preparation for hydrostatic tests.
The foundation of proper hydrostatic testing comes from setting specific criteria. It’s important to remember that one needs to fully remove subjectivity from the testing process. This begins by verifying the projected operating pressure. Next, one would properly define the testing metrics as 1.25 times that standard operating pressure. This accounts for worst case scenario type variation. Basically, the testing process errs on the side of caution. The test itself also needs to run for a period of two hours in order to provide proper verification of results.
It’s important to have all of this properly set out before the construction begins. There’s quite a few reasons for this. But the most important of the potential issues comes from building material. It will influence choice between different material in order to ensure the design lives up to the needed specs. For example, one wouldn’t use polyvinyl chloride for a high pressure system. Instead the choice would be something more along the line of ductile iron.
The people working on the hydrostatic testing should also have the proper background in the subject. This can often be accomplished on site. But it’s always valuable to have people who’ve completed the process before.
The initial process is fairly straightforward. One begins by doing a slow fill of the line. Next the line needs to be filled at the lowest point. During this process the air release at the top point needs to be properly set. The pump used for testing should then be hooked to the lower point within the line. A pressure gauge should be placed there as well. It’s important to note a couple things during this stage. The first is the fact that the gauge should be placed on the pipe. The pump is isolated from that aspect of testing. Next, the pump itself is also isolated in terms of the line. All other precautions should have been taken as well. This includes chlorination and bacterial testing.
There are quite a few concerns to keep in mind with testing. But it’s best to focus on the most common. For example, many people find themselves chasing after a leak within the line. They can spend a huge amount of time doing so. And they’ll often not even prove successful in the search. But on actually running the test they’ll find that everything worked out. This is often done by using make-up water. This can increase pressure to the starting point.
This might seem like an extensive amount of information to keep in mind when working with a water line. But one needs to remember the entire context of the test. Putting down lines requires a huge amount of time and effort. Much of this will need to be repeated all over again if anything goes wrong. Not to mention people can end up deprived of water if that does happen. It’s best to put the initial legwork into doing a test properly to ensure that there’s never a need to go back and fix a mistake.